How to Use WordPress for Dummies
So, you have installed WordPress on your server, and everything looks good. But how do you use WordPress?
To start using WordPress, you need to log into the admin section of your website. This section includes all the features and options to manage the website. Go to this address to access the admin area –
www.yoursite.com/wp-admin
Obviously, you need to change www.yoursite.com with your domain name. Provide the username, password, and click “Log In.” This will take you to a page like this –

This is your dashboard. You will perform all the website management tasks from the dashboard. Let’s get started with the posts.
Managing the Posts
Publishing new posts is the most performed task on any WordPress blog. To publish a new post, go to Posts > Add New. The page looks like the following –
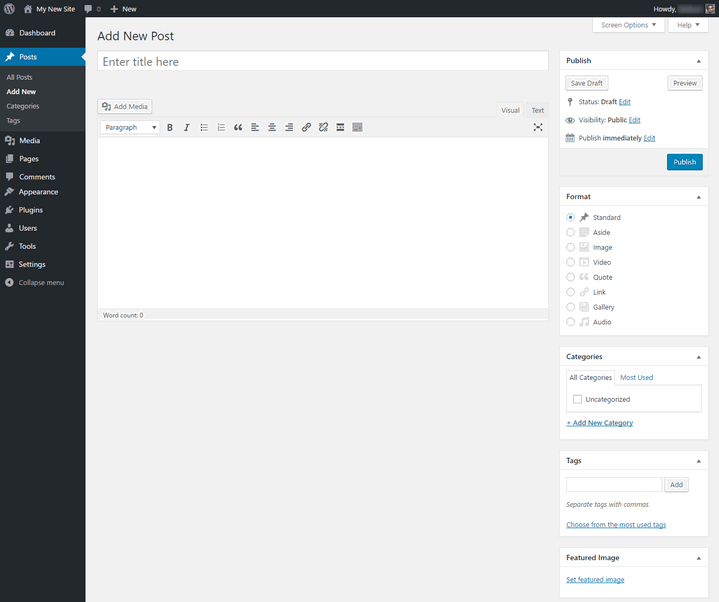
As you can see, the layout is divided into two columns. The left column is for providing the title and main content of the post. There are lots of formatting options for the content. You can apply various styles like bold, italic, strike-through, bullet or numbered lists, alignment, indenting, quote, etc. It is also possible to set up various heading tags and add links to your content.
You can add images by clicking the “Add Media” button. I will discuss more about uploading images shortly. Once the media files are uploaded, you can add these to your post. You will find separate options to define the title, caption, alt, description, alignment, link, and size of the image.
The right column enables you to set up other necessary options for the post. In the “Publish” section, you can save the post as a draft, check out the preview, or publish the post.
You can choose the post type in the “Format” section. In “Categories,” you can choose the category for the post. It is also possible to create a new category from there. The next section is for assigning tags to the post.
Lastly, the “Featured Image” is for setting up an image that will be displayed along with the post on the blog, archive, and other places.
You will find a list of all the posts at Posts > All Posts. From that page, you can edit, view, or delete the posts on your website.
Dealing with the Pages
WordPress pages work in almost the similar way as the posts. To add a new page, you have to go to Pages > Add New. The interface looks almost identical to adding a new post.
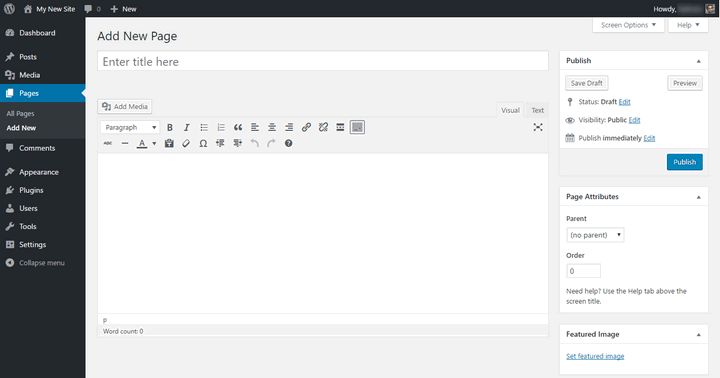
The left column is for the title and content. You will find all the formatting and media options like adding a new post. On the right column, you will find the familiar publish and featured image sections.
Handling Media Files
WordPress comes with simple ways to upload and manage media files. To upload a new media file, go to Media > Add New. On the resulting page, click the “Select Files” button, and choose your desired files.
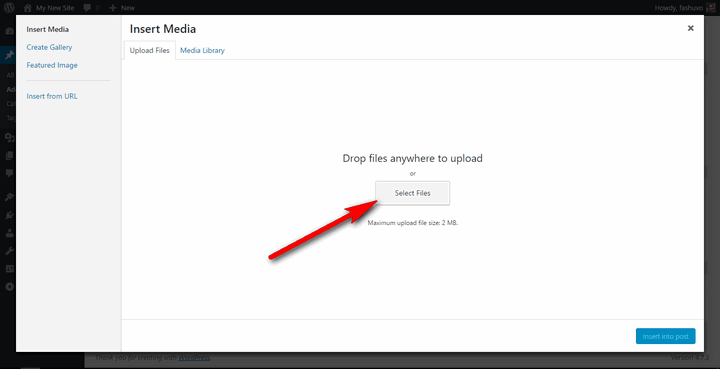
You can find all the media files at the Media > Library page. It is possible to view, edit, or delete any image from the media library. You will also find detailed information and separate fields for setting up the title, caption, alt, description, etc. for each image.
Managing the Comments
As your website grows, you will get more visitors, and some of them will leave comments. Click the “Comments” menu to check out all the comments. The comments are divided into separate types like the pending, approved, spam, and trash.
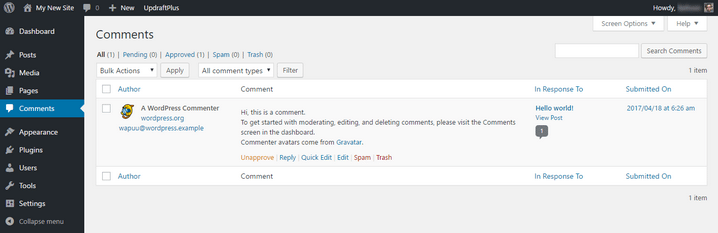
For each comment, you can check out the commenter name, email address, URL, the relevant post, date, time, and the comment itself. You will also find separate links to reply, edit, trash, or mark the comment as spam.
Setting up the Menu
You need to set up at least one navigation menu for your website. You can do that from the Appearance > Menus page. This takes you to a page like the following –
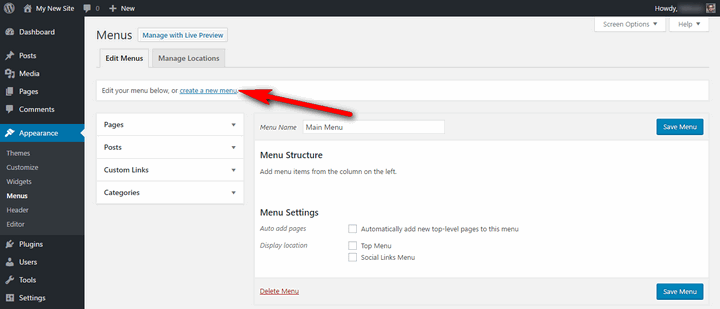
Click the “create a new menu” link, and provide a name for the menu. Next, you need to add menu items to the menu. You can add any of your posts, pages, categories, or any custom link to the menu. Make sure that you are choosing the desired location for the menu.
Lastly, click the “Save Menu” button to save the changes.
Managing Themes
The wide availability of themes is a notable feature of WordPress. You can use a theme to create the basic structure of your website with a few clicks.
WordPress comes with a few default themes. Feel free to check out these themes in the Appearance > Themes page. The currently activated theme will be specially highlighted. You can activate any other theme you want. To do that, hover over the theme, and click the “Activate” button.

You can add new themes too. If you want to install any of the free themes available in the WordPress theme directory, click the “Add New” button. The next page will show a list of the featured themes. There is a search field to help you find the desired theme. Once you have found the theme, hover over the theme and click “Install.”
It is also possible to install themes from other sources. To do that, click the “Upload Theme” button and upload the zip file of the theme. Once the theme is uploaded, install and activate it by following the same steps described above.
Using Plugins
Plugins make it very simple to add new features and improve the performance of your website. Every new WordPress installation comes with a few default plugins. You can activate, deactivate, or delete the plugins depending on your requirements.
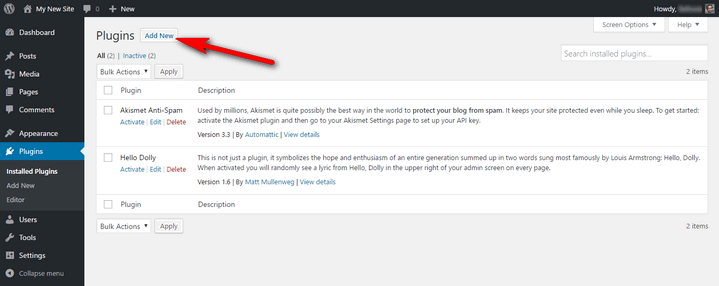
Click the “Add New” button to add a new plugin. You can install any of the free plugins available at the official plugin directory, or upload a third-party plugin. The upload process is the same as uploading a new theme.
Handling the Users
Do you remember that you created a new user when installing WordPress? You will find that user and all the other users you create in the future in the Users > All Users page. The page will display the name, username, email address, role, and the number of posts for each user.
To create a new user, go to Users > Add New. The page looks like the following –
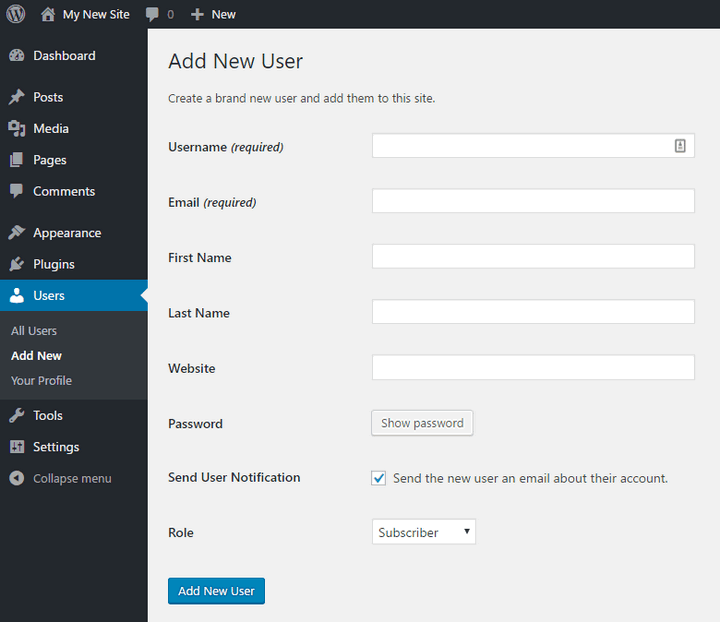
You will find separate fields for providing the username, email address, website, first and last name, password, and defining the user role. After you have provided the necessary information, click the “Add New User” button.
Setting Up Your Website
As you can guess, the “Setting” menu includes all the settings options for your website. In the “General Settings” page, you can define the website title, tagline, admin email address, timezone, time and date formats.
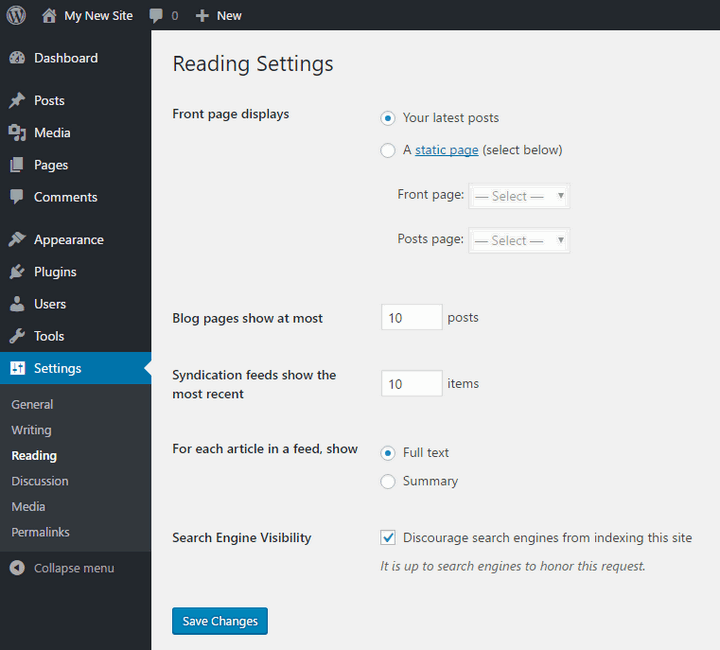
“Reading” is another important settings page. In this page, you can choose how the front page is displayed. You can choose to show the latest posts on the homepage, or set separate pages for the front and blog pages. There’s another option for defining how many posts should be displayed on the blog page.
Lastly, the “Permalinks” page enables you to choose the default URL structure for your content.
Final Words
And that’s how you use WordPress on a day-to-day basis. It may seem a lot for beginners, but give it some time, and you will get used to all these steps. After all, these are only the basics of WordPress. You can do a lot more with this powerful website creation platform.
So, did this article help you understand the basics of WordPress? Are you confident about using WordPress now? Let me know in the comments.
The post How to Use WordPress for Dummies appeared first on SoftwareFindr.
Written by - Visit WebsitePosted in Stuff from wprocks.com