The Best WordPress Security Guide – Step by Step (2017)
Sucuri releases a hacked website report for each quarter. Their latest report says that, of all the websites that were hacked in the third quarter of 2016, every 3 out of the 4 websites were developed on WordPress.
If you are running a WordPress site and haven’t been hacked yet, you are a very lucky. But how long will luck favor you?
Is it better to take chances based on luck, or be proactive and take preventive measures to make sure that you aren’t getting hacked? I can tell you voted for the proactive measures. In that case, you have come to the right place.
Secure your website with our ultimate 28-step security checklist for WordPress.
In this best and frequently updated WordPress security guide, I will share all the latest tips, trips, and techniques to enhance the security of your WordPress site. Follow these steps and will have strong reasons to believe that you will own that WordPress site which isn’t hacked or taken down.
Let’s get started with your personal security.
-
Maintain Personal Security
You log in to your WordPress site from your computer. It is also likely that you have saved the login information for your primary email address, the website, and lots of other critical information on your computer. What happens if your PC gets compromised? In some cases, hackers can also put malware into your browser or router. If any of these happens, hackers might get instant access to your email accounts, website(s), and the social media profiles.
Therefore, the first step in ensuring the best security of your WordPress site is to safeguard your computer. You should use an anti-virus program and keep it updated on a regular basis. These days, there are lots of new threats like ransomware, adware, spyware, crapware, etc. You need to use the Malwarebytes Anti-malware tool to detect these.
Other common personal security tips include enabling the firewall, using the latest versions of various software, using only trusted software, avoiding cracked or pirated software, being alert about social engineering, scams, and other phishing attacks, etc.
-
Keep WordPress Updated
WordPress is an open-source platform. That means hackers and evil people can inspect the code to find out bugs or weak points. These will help them gain unauthorized access to WordPress sites. But luckily, there are lots of security experts out there who are looking for these issues too. Once they report these issues, the WordPress team will release an update addressing those bugs and vulnerabilities.
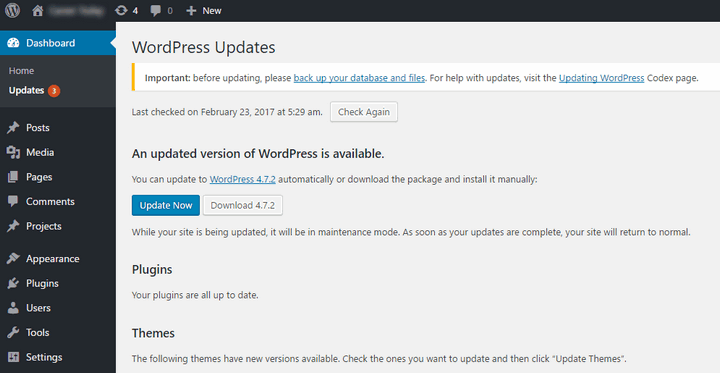
For instance, WordPress 4.7.2 is the latest version at the time of writing this post. And this security update has taken care of a severe security vulnerability along with 3 other security issues.
As you can see, using outdated versions of WordPress puts you into serious security risks. Hackers can easily find out sites still using older versions of WordPress and try to exploit the vulnerabilities.
So, if you haven’t updated your WordPress site yet, open a new tab and do it now.
I also recommend enabling auto-update for your WordPress site. To do that, add the following line to your wp-config.php file –
define('WP_AUTO_UPDATE_CORE', true);
-
Carry Out Regular Backup
Everybody knows the importance of keeping regular backups. But only a few follow through with the advice. The reason behind that is most people believe that they won’t get hacked, they won’t get locked out of their website due to incorrect security settings, or their server won’t crash.
But guess what? Smart Passive Income experienced a server issue, and big sites get regularly hacked (including Sony, the Home Depot, JPMorgan, Target, and TechCrunch).
Don’t risk losing your site only because setting up a backup schedule takes 30 minutes or so. Having the schedule in place will give an incredible peace of mind and save you in the case of any catastrophic events.
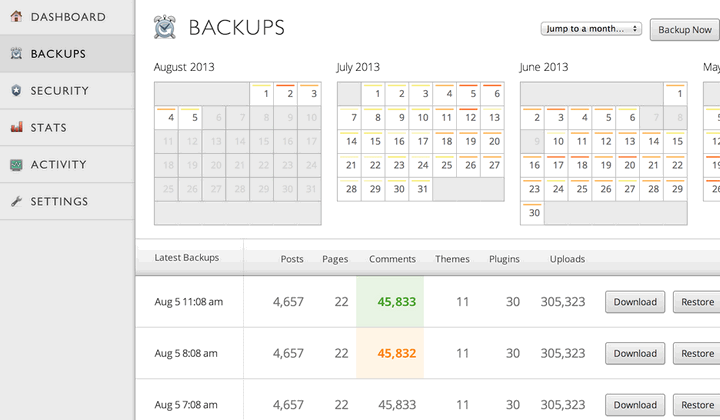
There are lots of excellent backup plugins for WordPress. First of all, there is VaultPress, a complete backup solution from the same company which created WordPress. It offers both daily and real-time backups along with simple restoration and site migration features.
If you are looking for free options, you can’t go wrong with UpdraftPlus, Duplicator, and BackWPup. Each of these plugins allows you to create regular backups and store the backup files on cloud storage services.
-
Use a Stronger Password
Using a weak password is one of the most vulnerable parts of your WordPress site’s security. While most people are still using the same old passwords over and over, I believe the WordPress website owners are better than that. But at the same time, password-cracking techniques are getting very sophisticated too.
As Wordfence has shown in this post, it will take a moderately powerful computer about 18 minutes to break a 9-character password containing only lowercase letters and numbers. Which means you can’t rely on the old-school methods of combining numbers and letters and thinking you are secure.
So, what’s the best way to create a stronger password for your website? First of all, you should use a combination of upper and lowercase characters, special characters, and numbers. The password length should be at least 12 characters. And it is a good idea to change your password at least once every 4 months.
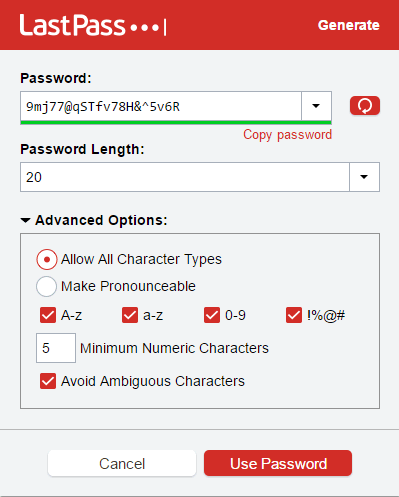
Generating and remembering difficult passwords is a boring and time-consuming process. This is why I suggest using a dedicated password management tool like LastPass to handle your passwords. This handy tool will help you create complex passwords and remember these passwords for you.
If you want to be absolutely sure about the login security, you should start using 2-factor authentication, which is our next step in this tutorial.
-
Add 2-Factor Authentication
As you can guess from the name, 2-factor authentication uses two steps to authenticate your identity before allowing you to log in. While there are different types of 2-factor authentication methods available, the most popular method is to use your mobile or tablet to verify yourself.
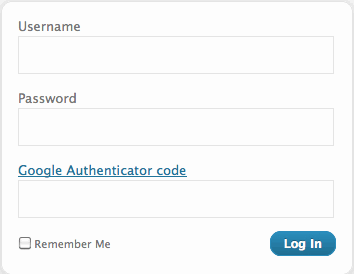
In this method, the first step is to provide your username and password. Provided these are correct, you will be allowed to proceed to the second step. In this step, you will get a verification code on your cellphone or tablet device. You have to provide that code to make the final confirmation. You can log in to the site only after finishing both of these steps successfully.
Using 2-factor authentication adds an extra layer of security to your website. When using this system, your website will remain secure even if someone manages to get access to your username and password.
Clef Two-Factor Authentication and Google Authenticator are two of the most popular plugins to enable 2-Factor authentication on your WordPress site.
-
Limit Login Attempts
The default setting of WordPress allows anyone to try unlimited passwords for logging in. Having open access like this, hackers use modern tools and scripts to try various combinations of usernames and passwords to gain access to the website. This is called brute force attack.
The best way to deal with this problem is to use a plugin which limits the maximum number of login attempts within a certain period of time. For instance, you can choose to temporarily block a visitor after 5 unsuccessful login attempts. It is also possible to select a custom lockout period for such attempts.
Login LockDown is the most popular plugin for limiting login attempts. By default, the plugin allows 3 login attempts in 5 minutes. Breaking this rule will block the IP address of that visitor for an hour. You can change these settings by going to Settings > Login LockDon from your website dashboard. The plugin also shows a history of the locked out IP addresses, which could be useful for some people.
-
Rename the Login Pages
For the majority of WordPress sites, the login page URL would be this –
Replace the ‘wp-login.php’ part with ‘admin’ ‘wp-admin,’ and you will be redirected to the same login page. Since this is the default setting, it is true for all WordPress sites. And most website owners don’t consider these as any kind of security threat.
But the reality is they could be potentially vulnerable points for your WordPress site. First of all, they leak the information that your website is powered by WordPress. And since most WordPress sites have an account with the ‘admin’ username, all the hackers have to do is to try brute force attacks to get your password.
To save your WordPress site from these vulnerabilities, you need to change the default login URL’s. There are several WordPress plugins which allow you to do that. WPS Hide Login and WP Hide & Security Enhancer are two of the most popular choices among these. Both of these plugins allow you to replace the default login URL’s with your own choices.
-
Change the ‘admin’ Username
As I have just discussed, most WordPress sites have an administrator account with the ‘admin’ username. This happens because WordPress used to choose this username on its earlier versions. While the newer versions allow the users to choose their own username, a lot of people still go for the ‘admin’ username. This makes the job half-easy for the hackers.
If you have any user on your WordPress site with ‘admin’ or other easily predictable names, you should change those usernames immediately. To do that, log into the PHPMyAdmin or any other database management tool your server is using. Run the following command in the database –
UPDATE wp_users SET user_login = 'newusername' WHERE user_login = 'admin';
Make sure that you have replaced ‘newusername’ with the username you want to use. And if you want to change the username for any other user, replace ‘admin’ with that username as well.
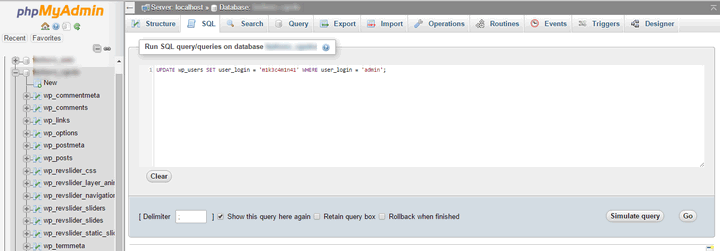
Alternatively, if you are not comfortable in dealing with the database, there is an easier option for you. Install the excellent WP-DBManager plugin on your website. This handy plugin allows you to run SQL commands right from your website.
-
Ensure Strong Spam Protection
Along with hackers, spammers are also a major threat to WordPress sites. The primary target of spammers is to use your server for sending spam emails. This can lead to your server IP address being blacklisted on the leading ISP’s and email services. You can avoid the spamming attacks by following the security advice mentioned in this article.
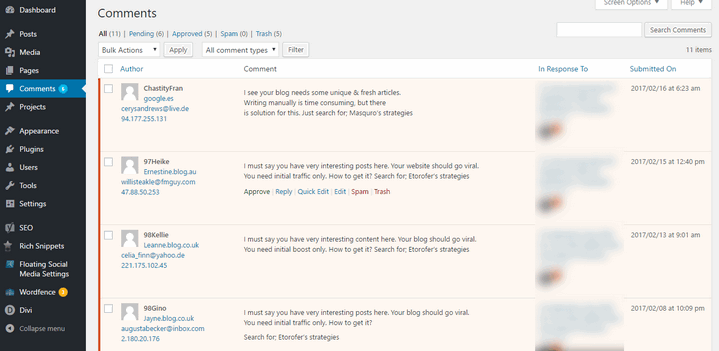
Spam comments are another irritating thing for website owners. Having spam comments indicates that you don’t care about the website quality, which may lead your visitors to lose faith from your website. Since most of these spam comments also content backlinks to their websites, it might leave a bad impact on your website’s SEO too.
There are several dedicated WordPress plugins which help you to prevent spam comments. Among these, Akismet comes pre-installed with WordPress. Other popular choices include WP-SpamShield Anti-Spam, SI CAPTCHA Anti-Spam, and Anti-spam.
10. Scan Your Website
Contrary to popular knowledge, hackers aren’t always taking down all the sites they can get their hands on. Instead, they might get control of your website and use it to send spam emails, conduct DDoS attacks, use your personal information for identity theft, or for whatever purpose they want.
The worst part is all of these can continue without you noticing anything suspicious. You only take preventive measures when you find out that your website is down. But you never know if or when your website is used for any of those activities. The best way to deal with this is to scan your website on a regular basis.
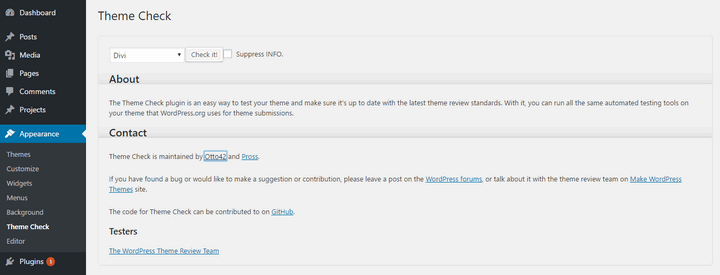
Performing regular scans of your website will help you find suspicious, malicious codes on your website and track any unauthorized changes in your website’s files. Popular plugins to scan website code include Theme Authenticity Checker, Ultimate Security Checker, Theme Check, and AntiVirus. Yes, I know the first two plugins haven’t been updated within the last 2 years. But these plugins are widely used and there haven’t been any bad reports so far.
On the other hand, if you want to track file changes on your WordPress site, you can use WordFence or iThemes Security to do so.
11. Use WordPress Security Keys
WordPress security keys were introduced in version 2.6 of the platform. These keys will add random elements to your password, making it a lot harder to crack. The keys also ensure better encryption for the data stored in the visitor’s cookies.
In general, self-hosted WordPress sites don’t have the security keys readily defined. You have to do it yourself. Luckily, the process is very simple.
First of all, go to the official secret key generator page. Each time you reload the page, a new set of keys will be provided. Copy all the content of the page. You have to add this code to the wp-config.php file of your WordPress installation.
You can access the wp-config.php file by using FTP or the default file manager provided by your hosting. Find out the following section in the file –
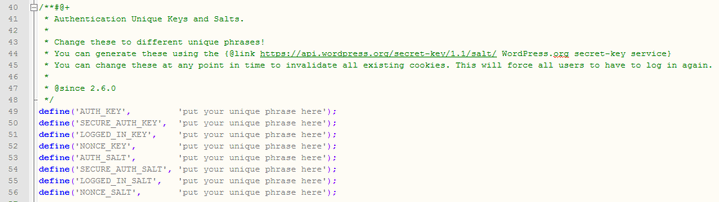
Replace these codes with the copied code from the secret key generator page. Save the wp-config.php file, and that’s it, you have successfully added an extra layer of security to your WordPress site.
12. Be Careful about Themes and Plugins
Themes and plugins are accountable for 49% of security vulnerabilities in WordPress. Another report reveals that about 1 in every 10 plugins in the official repository contains at least one medium-level security issue.
From all these statistics, it is absolutely clear that we need to be a lot more careful in choosing and using the themes and plugins on our WordPress sites. Yes, there is a review process before a theme or plugin gets accepted. But the process is run by volunteers, which means it is not full-proof.
So, how can you be careful about the themes and plugins used on your WordPress site? First of all, you need to make sure that you are using only the plugins you need. If you find a plugin which you aren’t using anymore, delete it immediately. The same advice applies to the inactive themes too.
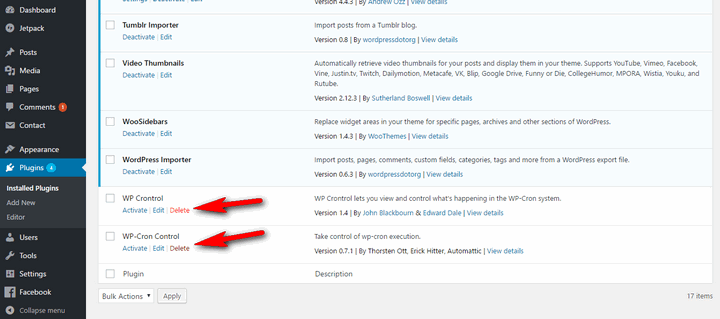
When installing new plugins, make sure that you are choosing ones which are actively maintained. For instance, you might find some plugin which hasn’t been updated within the last 2 years. You should be very careful in using such outdated plugins as they might contain security loopholes.
The best practice is to use themes and plugins from reliable sources only. Some common sources include the WordPress repositories, ThemeForest, CodeCanyon, Elegant Themes, MyThemeShop, StudioPress, WPMU Dev, Thrive Themes, etc.
Another important thing is to keep away from the cracked or nulled themes or plugins. A quick search on the internet will provide you with free copies of most of the premium themes and plugins. But the majority of these are injected with malicious codes, backdoors, or other kinds of security loopholes. Using these puts your site on serious risks of being hacked, abused, or taken down.
13. Disable File Editing
WordPress comes with simple solutions for editing the theme and plugin files right from the dashboard. You don’t even have to use FTP or the file manager to access these files. You can perform the changes as long as you can access the dashboard. This makes it very easy for the developers and admin(s) of your site to apply customizations or perform little tweaks quickly.
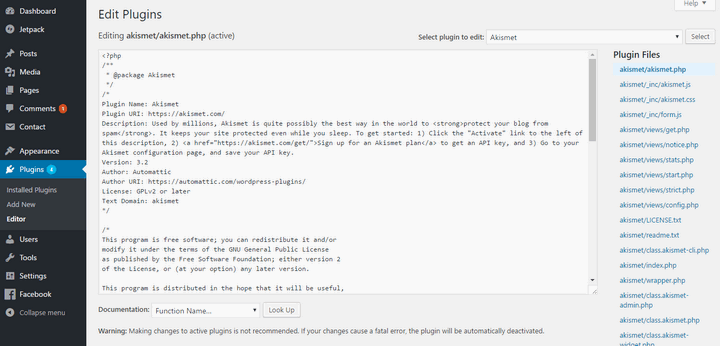
But what if a hacker gets access to the dashboard? He will have all the access as you do. Most importantly, he will be able to edit the theme and plugin files. This allows the hacker to inject and execute any malicious code on your website without requiring direct access to the server. This puts your website into serious security threats.
The best way to deal with this problem is to disable the theme and plugin editors. You can do that by adding the following code to your wp-config.php file –
define( 'DISALLOW_FILE_EDIT', true );
14. Disable XML-RPC
XML-RPC is the short form of XML Remote Procedure Call. This is required for using some Jetpack features, logging into your website’s admin section from smartphones, and for the pingbacks and trackbacks from other websites. XML-RPC has been with WordPress since the beginning.
There are two main vulnerabilities associated with XML-RPC –
- The xmlrpc.php file allows the attackers to test thousands of password without raising any issues for the standard security tools. This is confirmed by Sucuri.
- Incapsula has shown that the xmlrpc.php file offers an easy way to perform DDoS attacks on WordPress sites.
For both of these reasons, it is highly recommended that you disable XML-RPC on your WordPress site. There are two ways to do that –
- Rename the xmlrpc.php file to something else. You will find the file in the root folder of your WordPress installation.
- Add the following code at the top of your .htaccess file –
# START XML RPC BLOCKING
<Files xmlrpc.php>
Order Deny,Allow
Deny from all
</Files>
# FINISH XML RPC BLOCKING
15. Review the File Permissions
File permissions of your website define which type of user will have access to which function. The available functions include read, write, modify, delete, etc.
According to the official file permission article, there are three types of users –
- User: This is the owner of the website.
- Group: Other people who can log into your website, like the registered members.
- World: This is any visitor who tries to access the files.
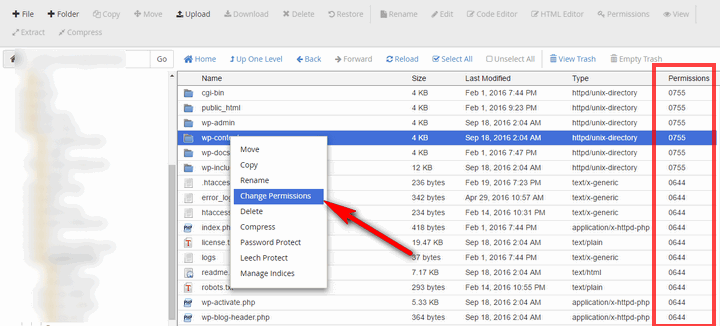
File permissions are 3-digit numbers. The first digit is for the user, the second one is for the group, and the third digit is for the world. The highest file permission is 777, where all three types of users are provided with all the functions. And the least possible permission is 444, where everyone can read the file only.
You should check out the official doc to have a better understanding of the various file permissions. In short, the doc recommends the following file permissions –
- Directories should have 750 or 755.
- Files should have 640 or 644.
- The wp-config.php file should have 400 or 440.
You can change the file permission by going to the file manager. Most file managers will show the permission status in a separate row. You can change the file permission of any file or directory by right-clicking on the item and choosing ‘Change Permission.’
Alternatively, you can change the directory and file permissions by using FTP or All In One WP Security & Firewall. Check out this detailed tutorial to know how to do that.
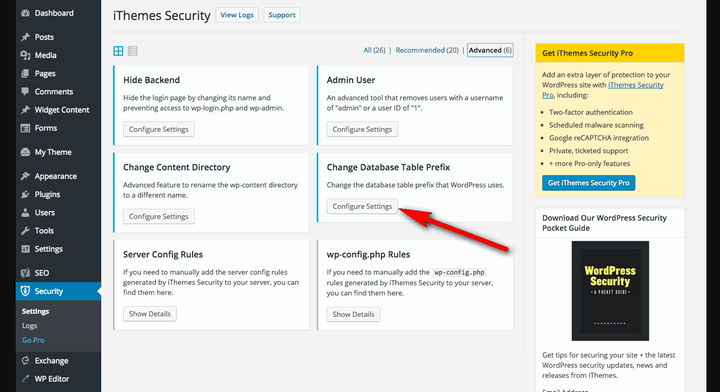
16. Change Database Prefix
This is another default setting of WordPress which can be potentially dangerous for your website, by default, all the tables of the database begin with ‘wp_’. What’s more, the database tables names are exactly the same for all WordPress installations.
This makes it a bit easier for the hackers to infiltrate your website. Luckily, it is not that hard to change the default table names. If you are already using a dedicated security plugin like iThemes Security, All in One WP Security & Firewall, or BulletProof Security, you will find dedicated options to do that.
Before you change the database table names, make sure that you are creating a complete backup of your website. This makes sure that you can get back to the previous condition in case something goes wrong during the process.
17. Use an SSL Certificate
SSL is the shortened form of Secure Sockets Layer. This is an encryption technology to ensure better security for the information exchanged between the website and the visitor. Having SSL implies an authentic, professional attitude, which is crucial for establishing your brand. And if your website involves any kind of monetary transactions, SSL is a must-have feature for you.
Still looking for more reasons? How about something from Google? Yes, the search engine giant has publicly stated that sites with SSL will get preference on its search result pages.
Now that you know why SSL is important for your site, check out this detailed post to know how you can get SSL for free.
18. Hosting Matters
When you want to ensure the best security for your WordPress website, you can’t ignore the importance of choosing a reliable host. A good web hosting service will perform regular maintenance to ensure the best performance out of the servers.
For instance, A2Hosting provides detailed information about their regular maintenance schedule. Before choosing a web host, you should find out what their maintenance policy is.
The main purpose of a hosting service is to make sure that their clients’ websites are available to the visitors 24/7. You need to choose a hosting which has long track records of offering excellent uptimes.

It is also important to make sure that your web host keeps regular backups of your website. That will keep you reassured that there’s an additional backup available even if your own backup fails for any reason. Other important features include support for the latest PHP and MySQL versions, WordPress-optimized firewall, and automatic malware scanning.
Among the different types of hosting packages, shared hosting is the most vulnerable one. Once hackers get access to a single website of the server, they might get unlimited access to all the other websites hosted on the same server. This is why VPS or dedicated servers are highly recommended to ensure the best security for your website.
19. Few More Important Tips
Along with the steps mentioned above, here are some other tips you can use to further strengthen the security of your WordPress site –
- Add a captcha or security question to the login page. This will be a useful step to prevent the brute force attacks. Better WordPress reCAPTCHA could be an excellent choice in this case.
- Use the .htaccess file to strengthen security. Follow this in-depth tutorial to know more about the process.
- Remove the WordPress version if you are not using the latest version of the platform. This post at WP Beginner shows you how to do that.
- Tracking the dashboard activity of the users could be an excellent way to find out potential security loopholes. Here’s a detailed guideline about how to do that.
- Disable PHP file execution to prevent unexpected events from taking place on your website. Here’s how to do it within a few minutes.
- Set up a system to log out idle users and to save your WordPress site from session hijacking attempts. Check out this tutorial to find out how to do that.
Over to You
Ensuring the best security for your WordPress site is an ongoing process. Nobody can ever claim to have the complete list of actions to secure your WordPress website. Having said that, you can rest assured that this is one of the most up-to-date WordPress security guides you will find right now.
Following the tips mentioned above will definitely make your website a lot more secure. And the regular backup will make sure that you can get back your site even if you get hacked or lose your data.
So, which of these measures are you applying right now? Did I miss any of your favorite WordPress security step in this tutorial? Let me know in the comments.
The post The Best WordPress Security Guide – Step by Step (2017) appeared first on SoftwareFindr.
Written by - Visit WebsitePosted in Stuff from wprocks.com